There are some new features in Windows 10, but we also need to take into account the problems. Windows 10 has been loaded with issues from the start for a lot of users.
The majority of issues arise immediately after upgrading to Windows 10 and involve hardware drivers.
The Generic PnP Monitor issue is the most recent in a long line of Windows 10 problems. After upgrading to Windows 10, many users have complained that Windows is no longer recognising their monitor.
This is obviously a driver-related problem. However, it may also be caused by hardware or cable issues. You shouldn't be concerned if you are also experiencing this problem.
We'll use our techniques to assist you in resolving this issue. Simply implement each technique one at a time until the problem is resolved.
If it still doesn't work, try the below fixes.
{autotoc}
How to Fix the Generic PnP Monitor Issue
This is an abbreviation for plug and play. Without the need for a driver to be installed, PnP hardware begins to function when it is plugged in. When Windows is unable to recognise a device, you will see a generic PnP monitor in the device manager.
Windows puts in a generic monitor driver when this occurs. The driver might not be compatible with the monitor's hardware, so this is not always the case. The result is monitor problems.
To solve the issue, use the suggested methods.
1. Reconnect Monitor
This method may be useful when using a desktop. To use this technique, adhere to the steps.
Step 1: Shut down your computer or monitor.
Step 2: At this point, you must disconnect the monitor's power cable.
Step 3: Disconnect the CPU's video cable and wait five minutes.
Step 4: Connect the monitor's power cord and video cable to the CPU.
Step 5: Start the computer again.
2. Update Generic PnP Monitor Driver
The most beneficial approach that has proven successful for many users is updating the driver. There is a good chance that the driver is to blame for the issue.
Therefore, we will update the monitor's driver using this method. To do so, adhere to the steps below.
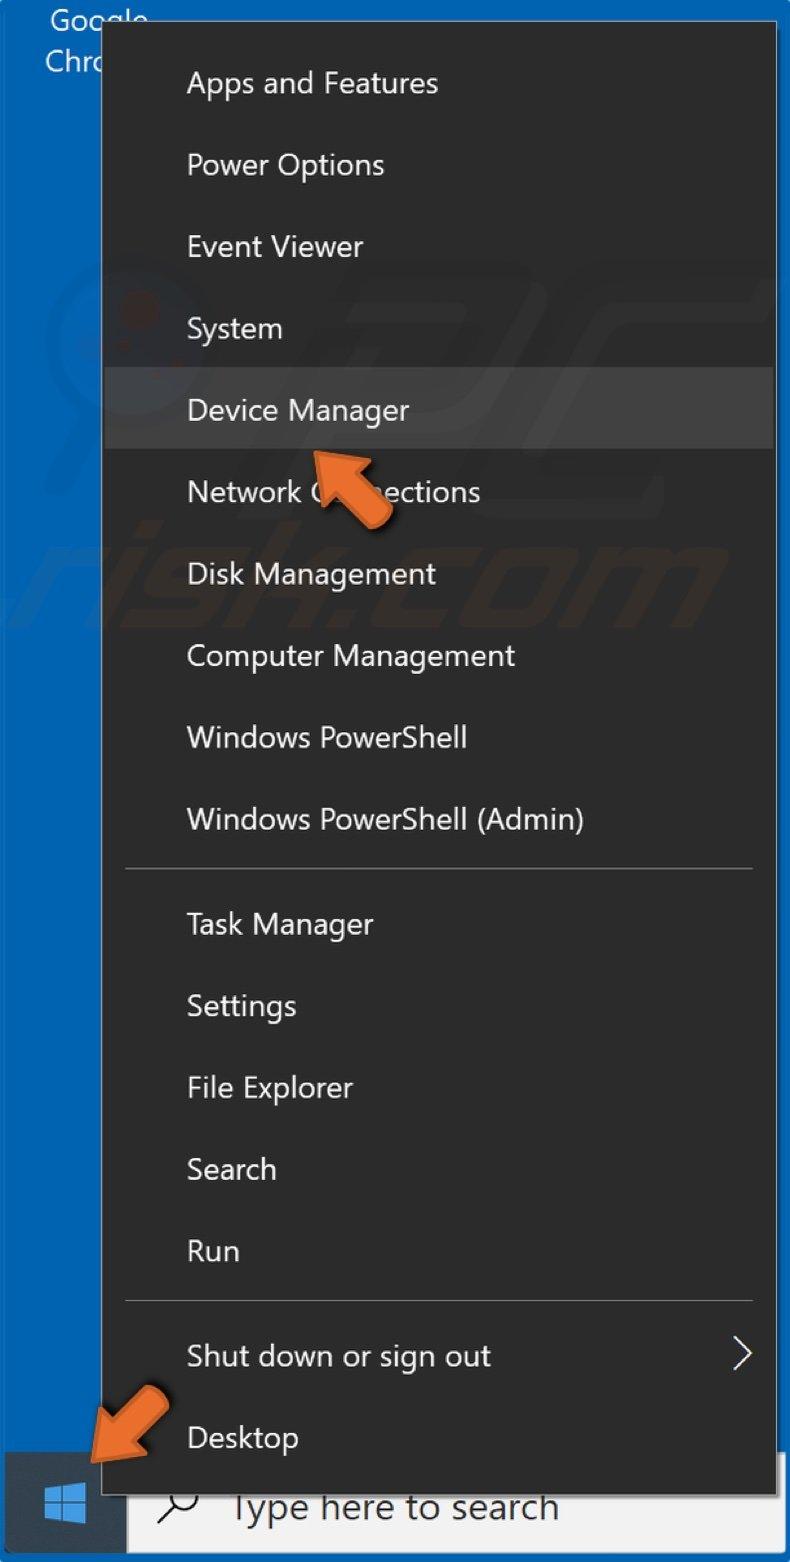
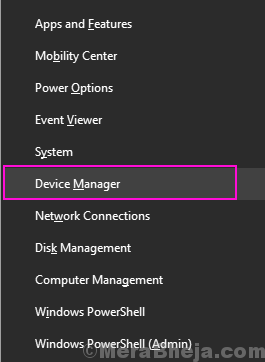
Step 1: To access Device Manager, do a right-click on the Start menu button.
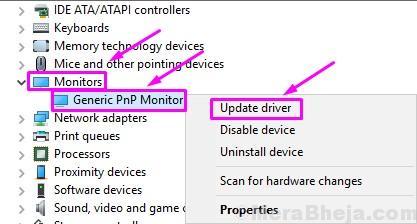
Step 2: Expand the Monitors option in the Device Manager window after it has opened. Right-click Generic PnP Monitor in the Monitors expanded menu. Choose Update Driver from the right-click menu that appears.
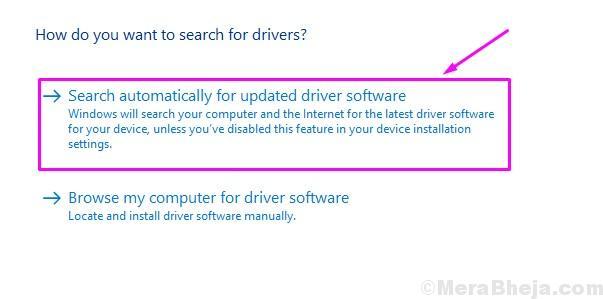
Step 3: A dialogue box will appear after the previous action. Select the first option in this menu, Automatically check for new driver software. This will automatically download and install the driver from the Internet.
Step 4: Restart your computer after the driver has been installed. If Windows was unable to locate and install the driver, proceed to the next step.
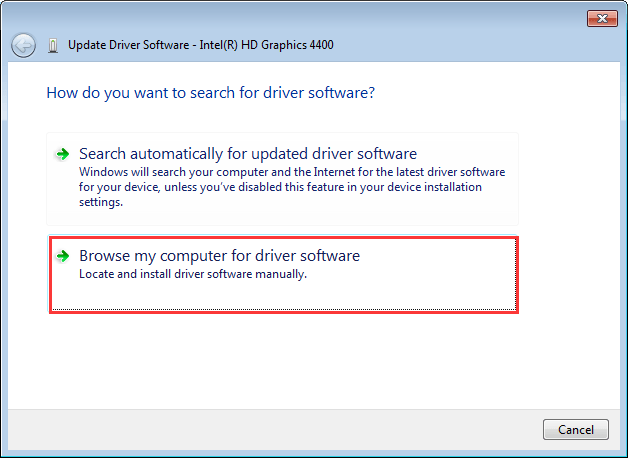
Step 5: Return to step 3 and choose "Browse my computer for driver software" this time.
Step 6: Allow me to choose one from a list of device drivers on my computer.
Step 7: Tick the box next to Display compatible hardware to see the compatible devices.
Install any other compatible device you choose from the list here besides the Generic PNP monitor.
Step 8: Restart your computer after installing the driver.
This should resolve the problem. The next approach should be used if the issue is still present.
3. Update Display Card Driver
The graphics card driver is frequently to blame for monitor problems. Therefore, we will update the graphics card driver using this method. To use this technique, adhere to the steps.
Step 1: To access Device Manager, do a right-click on the Start menu button.
Step 2: Expand the Display Adapters option in the Device Manager window after it has opened. Click the right mouse button on your graphics card in the Display Adapters expanded menu. From the pop-up right-click menu, choose Update Driver.
Step 3: A dialogue box will appear after the previous action. Choose the first choice in this menu, "Automatically check for new driver software." This will automatically download and install the driver from the Internet.
Step 4: Restart your computer after the driver has been installed.
Repeat this process for the additional graphics card if your computer has integrated graphics.
If Windows is unable to locate updated driver software online, go to the websites of the manufacturers of your computer or graphics card. Install the most recent driver by downloading it from there.
This must surely resolve the problem. If the issue persists, try the following strategy.
4. Uninstall Generic PnP Monitor Driver
Monitor issues can occasionally be resolved by rolling back the driver. Therefore, we will uninstall the generic PnP monitor driver using this method.
Don't worry; Windows will identify it as new hardware and install the necessary drivers. To use this technique, adhere to the steps.
Step 1: To access Device Manager, right-click on the Start menu button.
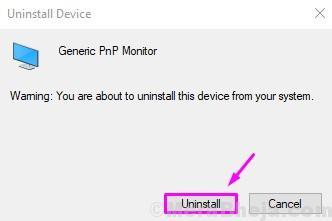
Step 2: Expand the Monitors option in the Device Manager window after it has opened. Right-click Generic PnP Monitor in the Monitors expanded menu. Choose "Uninstall device" from the pop-up right-click menu.
Step 3: Select "Uninstall" when prompted for confirmation.
Step 4: At this point, select Scan for Hardware Changes.
After the final step, Windows will identify the monitor as the actual monitor and install it instead of the generic PnP monitor.
Follow the next strategy if it didn't work and you are still having problems.
5. Run the System File Checker
The automatic troubleshooter in Windows is called the System File Checker. It checks for damaged system files and troublesome drivers, restores or fixes them.
To use this technique, adhere to the steps.
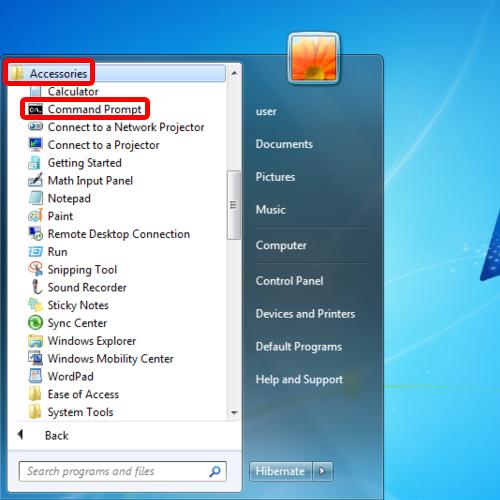
Step 1: Type Command prompt into Cortana. In the list of results, right-click Command Prompt and choose "Run as administrator."
Step 2: Type the following command into the Command Prompt window and hit Enter.
sfc /scannow
Step 3. Remain patient while the SFC scans and corrects the problems. Be patient; this could take up to 15 minutes.
The issue must already have been resolved when the process is finished.
Try the next one if this one didn't work for you.
6. Check for Windows Updates
Periodically, Microsoft releases Windows Updates to address various bugs and errors in Windows 10. So, check for updates in Settings.
Download and install any pending updates if there are any. It might solve your problem.
This ought to make the issue go away.
Additionally, you can download this PC repair tool to find and resolve any PC problems:
Step 1: Click here to download the Restoro PC Repair Tool.
Step 2: Select "Start Scan" to find and automatically fix any PC issues.
We trust we were able to assist you in solving this issue. Please leave a comment below if another approach worked for you or if you have any questions about this problem.
Generic PnP Monitor problem FAQs
How can I fix the Windows generic PNP monitor driver issue?
An Update Driver can be found by right-clicking the Generic PnP Monitor driver and choosing it. Choose to search automatically for updated driver software in the following window. After that, complete the process by adhering to the on-screen instructions. Restart your computer once you're done. Remove the Generic PnP Monitor Driver, then check for hardware modifications.
What exactly is a PnP device issue?
PnP is short for plug and play. A PnP device works as soon as it is plugged in without the need for a driver to be installed. When Windows is unable to recognize a device, you will see a generic PnP monitor in the device manager. Windows puts in a generic monitor driver when this occurs.
Why do I see generic PnP on my monitor?
When using an external monitor with a laptop or desktop computer, the "Generic PNP Monitor" problem can occur for the following reasons: The display adapter's (VGA) driver is either incompletely or incorrectly installed. The Monitor's driver is not correctly installed.