How to Disable Directory Browsing in WordPress
by
7-layers of Security for Your WordPress Site
Your website needs the most comprehensive security to protect it from the constant attacks it faces everyday.

WordPress has many features, like directory browsing, that can be very helpful to developers.
But, what is good for the goose—the good developer—- is also good for the gander— – the hackers. This is why it’s important to have a WordPress security checklist of measures to take to protect your site. Disabling directory browsing is one of those items on the checklist.
Enabling directory browsing on your website is like leaving the blueprints of a building out in the open for anyone to see. Just as architects need the blueprints for constructive purposes – to understand the structure, layout, and details of the building, they also serve as a treasure map for potential thieves, outlining the easiest points of entry and where the most valuable items are likely to be kept. Disabling directory browsing is about ensuring users see only what you wish to show while precious data and files remain hidden and secure.
In this article we will go over the steps to first check if directory browsing is enabled on your site and if so, how to disable it.
TL;DR: There are two ways to disable directory browsing in WordPress: either using cPanel or editing a core configuration file. Either way, make sure to take a backup of your site before making any changes.
What is directory browsing?
Directory browsing is the ability to view the contents of directories within the WordPress website structure, invariably a list of files and subdirectories.
WordPress relies on an index file in each directory to display the content and structure of the site. When a user accesses a directory on a WordPress site, the index file is automatically loaded and shown instead of allowing direct access to the files within the directory. If there is no index file available, generally WordPress will list out the directory’s contents.
Ideally, for WordPress sites, directory browsing should be disabled, meaning that when a user tries to access a directory on a WordPress site, they will be shown a 403 Forbidden error page instead of a list of files.
Security concerns about directory browsing
Directory browsing reveals your site’s structure, inadvertently serving as a roadmap for those with malicious intent. Intruders can easily uncover vulnerabilities on your site by examining plugins and themes installed on it.
Moreover, your website’s file structure may disclose sensitive data that should remain private, including backup and configuration files.
Perhaps the most worrying part? Even unlinked files can be vulnerable if the file path is known to attackers. However, disabling directory browsing helps prevent unauthorized access to such files, fortifying your website’s security.
In fact, a lot of web hosts disable this feature by default. So there’s a chance you won’t have to do it again. However, it is prudent to check for it, which is what we talk about in the next section.
Is directory browsing enabled on your site?
Directory browsing is a very common, however because of the associated security concerns, it is often disabled before a site goes live. You can manually check if it is enabled on your site by using the following steps:
- Visit a site directory from your browser: In the address bar, type out the URL of your website. This needs to be followed by the name of a directory. For instance: www.example.com/wp-includes/.
- Check the outcome: If you can view a list showcasing files and folders contained in that directory, directory browsing is enabled on your website.
The result you ideally want is an error message like “403 Forbidden” or “This page is not available”. These messages indicate that directory browsing is disabled on your site, which is a positive sign. If not, directory browsing has been enabled on your site.
4 ways to disable directory browsing on WordPress sites
We’ve talked about what directory browsing is, why it is dangerous, and how to check if it is enabled. Now, let’s dive into two methods to disable it.
1. Edit the configuration file
One effective way to disable directory browsing on your WordPress site is to edit the .htaccess file—a configuration file used by the Apache web server. By adding a simple line of code to this file, you can instruct the server not to list the contents of your directories.
The .htaccess file is typically located in the root directory of your website and can be accessed via an FTP client or through the file manager in your web hosting control panel.
Please exercise caution when editing this file, because a minor mistake could lead to major issues on your site. Hence, we recommend creating a backup before making any changes.
Pro tip: Always create a backup of your website before making any changes. This ensures that you can restore your site to its previous state if something goes wrong. We recommend you take a full backup with BlogVault. If anything goes wrong, BlogVault will restore your site in minutes.
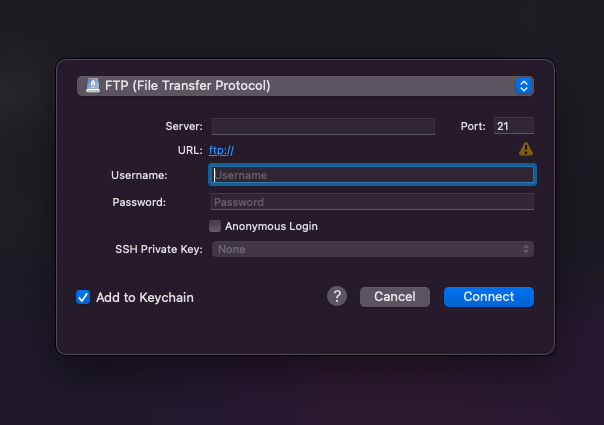
- Connect to the server: Download and install an FTP client like FileZilla or Cyberduck. Next, use your FTP client to connect to your site server. You will need credentials that include your FTP server address or hostname, your FTP username, and your FTP password to establish a connection. They can be found on your control panel or your web host account. For example, we’re using Cloudways, and these details can be found in Access Details in the Application Management section.
- Download the .htaccess file: The .htaccess file is usually located in the root directory of your website, often called public_html. The file may also be hidden, so you will need to configure settings in the FTP client to show all hidden files. Once you locate the file, download it to your local system. This step provides a safety net in case of any errors.

- Edit the .htaccess file: Open the .htaccess file in a text editor like Notepad++ or Sublime Text. At the end of the file, add the following line of code to the top of the file:
Options -IndexesThis line of code instructs the server not to list the contents of your directories.
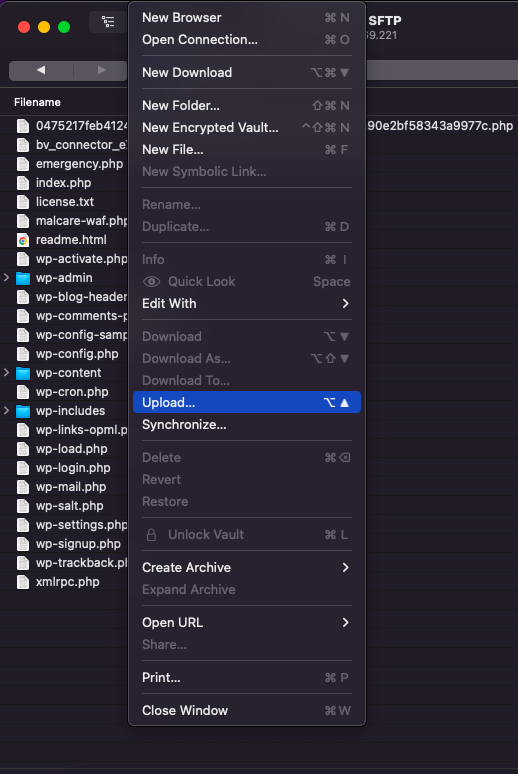
- Save and upload: After adding the code, save your changes and then upload the updated .htaccess file back to your web server, overwriting the existing file.
To check if the changes have been implemented successfully, try accessing a directory on your website again. Instead of a list of files and folders, you should now see a “403 Forbidden” or similar error message.
Please remember to be cautious when editing the .htaccess file, as misplaced characters can cause significant problems for your site.
Additionally, please note that this is only for Apache servers. The instructions for disabling directory browsing on Nginx servers are different.
If you’re using an IIS server, this feature is disabled by default but you can check by going to the Directory Browsing section on the IIS Admin Console. Then, select Off and Set Directory Browsing to confirm the change.
2. Use a plugin
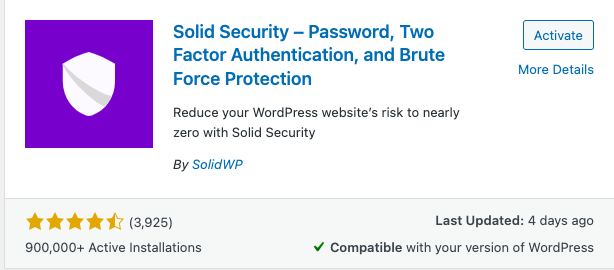
Solid Security, formerly known as iThemes Security is one of many security plugins that we have tested. It has some features, including the ability to disable directory browsing, that can help make your site a little more secure. Here are the steps to disable directory browsing using the plugin:
- Install and activate the plugin: To install and activate the iThemes Security plugin, first hover over Plugins in the sidebar and click Add New. Search for Solid Security in the search box, then click Install Now. After installation, click Activate.
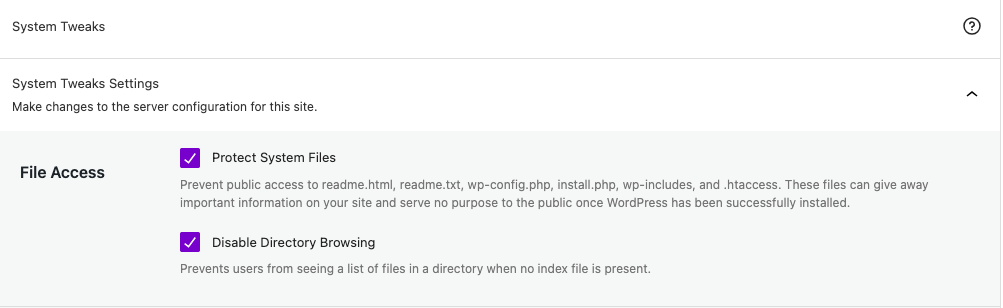
- Navigate to advanced settings: In the sidebar, click Security. This is the settings page for Solid Security. Then, click Advanced in the menu on the left.
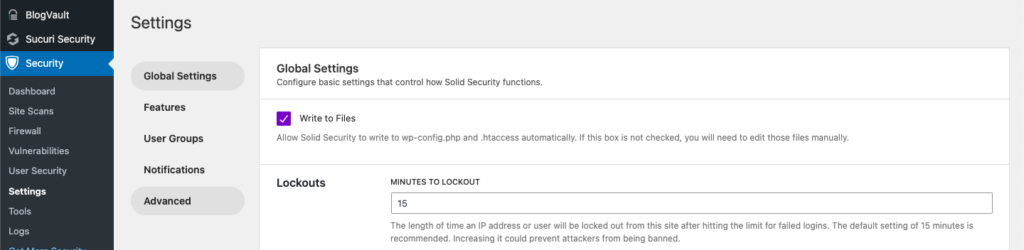
- Disable directory browsing: Here you will see different sections for various security options. Look for the System Tweaks box. Find the option that says “Disable Directory Browsing”. Check the box next to it. Click Save at the bottom of the page.
3. Via cPanel (2 ways)
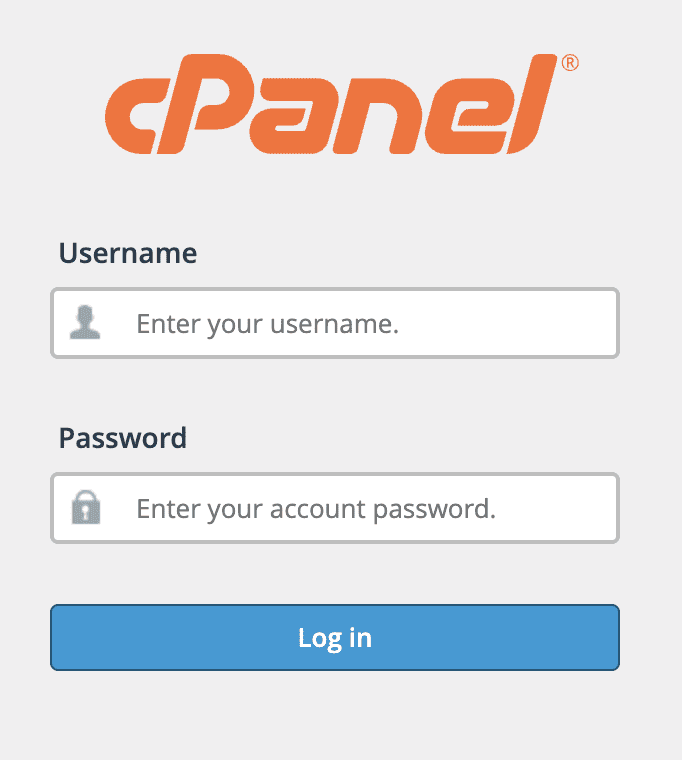
In method one we talked about disabling indexing via the .htaccess file. Here are two ways to do it via the cPanel, So first, login to the cPanel. by entering its URL which usually follows this format ‘http://yourwebsite.com/cpanel’. Once you’ve navigated to this address, you will be prompted to enter your username and password – these credentials are typically supplied by your web hosting provider upon the creation of your account. After you’ve entered your login details, click the ‘Log in’ button and you should be able to follow one of these two methods to manage your indexes.
A. Via File Manager
- Open file manager: One cPanel, scroll down to the Files section and click File Manager.

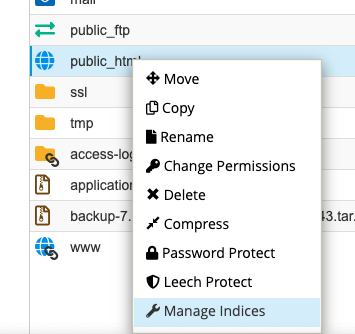
Change settings for indices: Select the directory that you’d like to disable the feature for. Then, right-click and click on Manage indices.
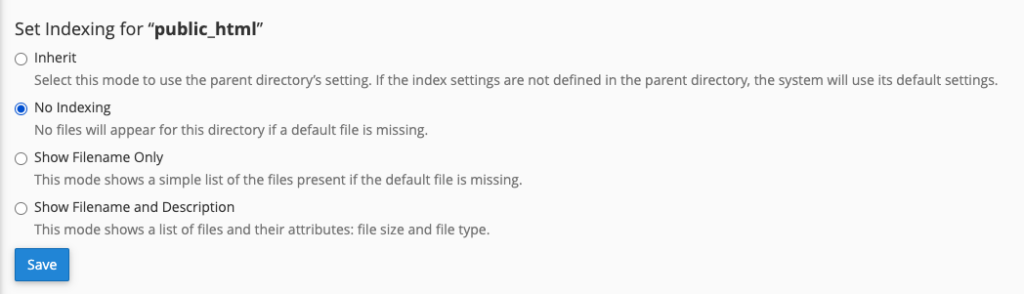
No-index the directory: You will be redirected to the indexes page. Click on No indexing. Then click on Save.
B. Via indexes:
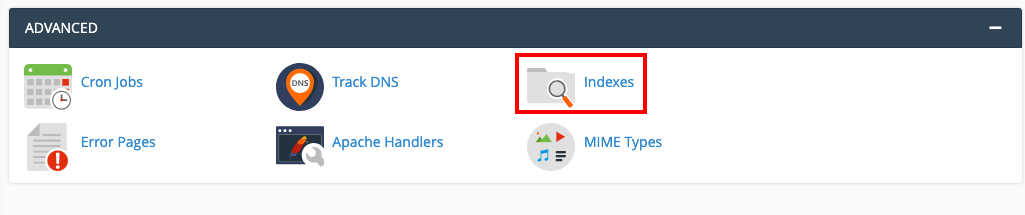
- Open the Indexes settings: On cPanel, scroll down to the Advanced section and click Indexes
- Edit the directory settings: We want to disable directory browsing for our root folder so we selected public_html. Click the Edit button that is beside the directory that you want to no-index.
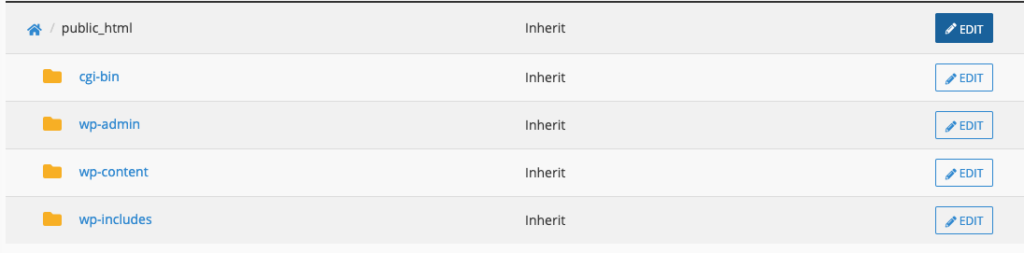
- No-index the directory: Select No indexing from the options available and click on Save.
4. Edit file permissions:
File permissions are a useful way to restrict unauthorized access to your site files. We recommend using it as a hardening method to make your site more secure. There are a few different ways to do this, but we’re using cPanel.
- Login to cPanel: To log into cPanel, open your preferred web browser and enter your website’s domain name followed by “/cpanel” (e.g., www.yourwebsite.com/cpanel) into the address bar. You will be redirected to the cPanel login page. Enter your username and password in the provided fields. These details are usually provided by your hosting company at the time of your account creation or after purchasing hosting. After entering your details, tap on the “Log in” button to access your cPanel account.
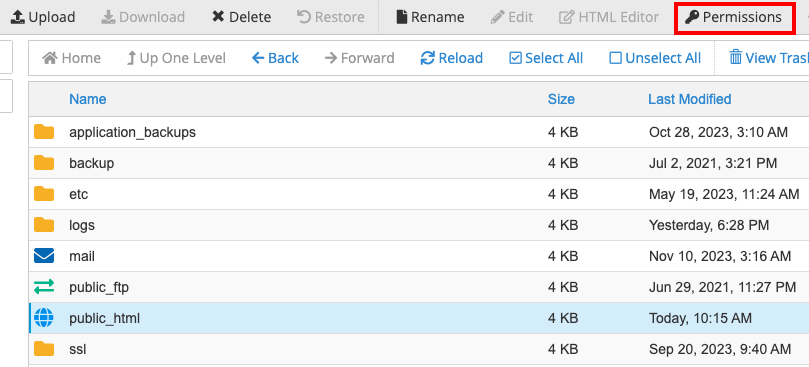
- Navigate to directory permissions: Select the directory you’d like to change permissions for and click Permissions at the top of the page. A popup will appear.
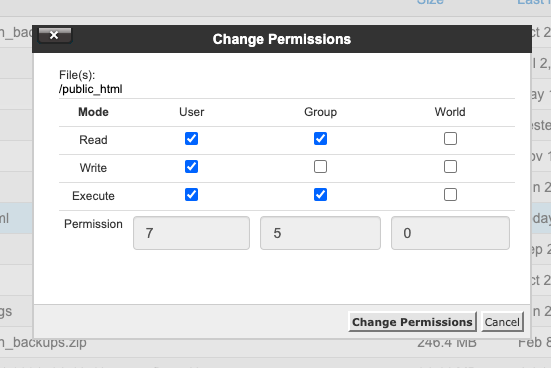
- Change the permissions: Change the numbers at the bottom to 771. This means that only the owners and groups can access the files in that directory. Click on Change Permissions when you are done.
Troubleshooting
Running into issues while disabling directory browsing? Here are some troubleshooting tips:
- Check syntax: Coding errors can be as simple as a misplaced character or incorrect syntax. Double-check the line of code you’ve added in the .htaccess file to ensure accuracy and correct syntax.
- Confirm you have the right .htaccess file: Check to ensure that you’re editing the correct .htaccess file. WordPress websites often have more than one .htaccess file. The file you need to edit is usually located in the root directory of your website.
- Check for conflicting plugins: Some plugins might interfere with the changes made in the .htaccess file. If problems persist after editing, deactivate your plugins one by one to see if a particular plugin is causing the conflict.
- Reach out to your hosting provider: If none of these steps resolve the issue, it might be time to reach out to your hosting provider. They could provide additional insight or take action from their end to resolve the issue.
Other security measures to take
Disabling directory browsing is one of many things that should be on your security checklist. Let’s explore some other security measures you can implement:
- Install a firewall: A web application firewall filters, monitors, and blocks malicious traffic before it can reach your site. Implementing a firewall adds a robust layer of security. MalCare has the best firewall in the WordPress security market and all you need to do is install the plugin.
- Install a security plugin: There are many quality security plugins that we’ve tested and MalCare has always come out on top for its malware scanner, one-click malware removal, and extensive understanding of how WordPress security works.
- Implement good login security: This includes enforcing strong passwords, limiting login attempts to prevent brute force attacks, and implementing two-factor authentication.
- Prevent WordPress user enumeration: User enumeration is a technique used to discover usernames, making it easier for hackers to crack passwords. You can prevent this by adjusting your website’s settings or using dedicated plugins.
- Disable file editing in WordPress: WordPress allows you to edit theme and plugin files directly within the admin area. Disable this feature to reduce the risk of a successful attack should unauthorized users gain access to your backend.
- WordPress monitoring: Another good way to secure your website is by continuously monitoring it for any changes. Several plugins alert you when a file in your WordPress installation is added, removed or changed. You can also get notified about all login attempts.
- WordPress hardening: This involves taking extra measures to make sure your site is inaccessible to hackers. Aspects of hardening include protecting your wp-config.php file, disabling directory browsing, ensuring that your WordPress core, plugins, and themes are always updated, and installing SSL to encrypt data, among others.
Final thoughts
Directory browsing can reveal your site’s structure to potential hackers, but blocking it doesn’t automatically shield you from all threats. It doesn’t address other vulnerabilities like weak passwords, outdated plugins, and themes, insecure hosting, or potential attacks.
To ensure comprehensive protection, consider installing a dedicated security plugin like MalCare. With its robust firewall, regular security scans, and automatic cleanups, MalCare provides an all-encompassing safety net for your WordPress site.
FAQs
What does disabling directory browsing do?
Disabling directory browsing prevents unauthorized users from viewing the contents of your website directories. This helps protect sensitive information and enhances your site’s security.
Is it necessary to disable directory browsing?
Yes, it’s recommended to disable directory browsing for security reasons. It prevents potential hackers from gaining insights into your site’s structure and accessing sensitive files.
What is directory browsing?
Directory browsing allows anyone on the internet to see the files and folders on your website. If not disabled, it can potentially give hackers insights into the structure and content of your site, making it easier for them to exploit any security weaknesses.
How can I check if directory browsing is enabled on my WordPress site?
You can check if directory browsing is enabled on your site by typing your website URL followed by the name of a directory in your web browser. If a list of files and folders in that directory is displayed, directory browsing is enabled.
What are the security risks associated with directory browsing on WordPress?
Directory browsing can expose your site’s structure, reveal sensitive files, assist hackers in crafting targeted attacks, and expose backup files, configuration files, or other confidential information, making your site vulnerable to attacks.
How do I disable directory browsing on my WordPress site hosted on an Apache server?
You can disable directory browsing on an Apache server by adding a line of code – ‘Options -Indexes’ – to the .htaccess file in your site’s root directory.
Which security plugins can help me disable directory browsing on my WordPress site?
Several security plugins can help disable directory browsing on your site, including iThemes Security, All In One WP Security, and BulletProof Security.
Can I disable directory browsing through my hosting control panel?
This depends on your hosting provider. Some hosts allow you to disable directory browsing through cPanel, while for others you would need to modify the .htaccess file.
What are the risks of leaving directory browsing enabled on my site?
Leaving directory browsing enabled can expose sensitive data, reveal your site’s structure to potential attackers, and lead to targeted attacks exploiting known weaknesses in plugins or themes.
What happens if I don’t disable directory browsing on my WordPress site?
If you don’t disable directory browsing, you risk exposing sensitive information about your site’s structure and files to potential hackers, which could lead to security breaches.
Are there any SEO and user experience considerations related to directory browsing?
Directory browsing doesn’t directly impact SEO or user experience. However, a secure site is crucial for user trust and SEO rankings, and since disabling directory browsing enhances security, it indirectly benefits SEO and user experience.
What’s the role of the .htaccess file in disabling directory browsing?
The .htaccess file is a configuration file used by the Apache web server. By adding the ‘Options -Indexes’ line to this file, you can instruct the server not to list the contents of your directories, thereby disabling directory browsing.
Should I consider other security measures in addition to disabling directory browsing?
Absolutely. Disabling directory browsing is just one step in securing your WordPress site. Other measures include keeping WordPress and all plugins/themes updated, using strong passwords, and installing a security plugin like MalCare that can implement a good firewall and regularly scan for malware.
Category:
Share it:
You may also like

MalCare Proactively Defends Against Icegram Express SQL Injection Vulnerability
MalCare’s recent data has revealed numerous attempts to exploit a newly found SQL injection vulnerability in the Icegram Express plugin. Attackers commonly use this sophisticated SQL injection technique to extract…
Atomic Security’s Deep WordPress Integration Helps Protect Against Core XSS Vulnerability
The recent WordPress core vulnerability is a critical one, primarily because of two reasons. Firstly, it affects the WordPress core itself, which means that every WordPress site is vulnerable to…
How to Fix the Deceptive Site Ahead Warning on Your WordPress Site
When Google shows a Deceptive Site Ahead warning to a site visitor, it means they think your website might be harmful due to malware, phishing, or other security risks. This…
How can we help you?
If you’re worried that your website has been hacked, MalCare can help you quickly fix the issue and secure your site to prevent future hacks.

My site is hacked – Help me clean it
Clean your site with MalCare’s AntiVirus solution within minutes. It will remove all malware from your complete site. Guaranteed.

Secure my WordPress Site from hackers
MalCare’s 7-Layer Security Offers Complete Protection for Your Website. 300,000+ Websites Trust MalCare for Total Defence from Attacks.


