Many website owners are under the impression that google recaptcha is a difficult process. That is not true! In this blog post, we will show you how to add google recaptcha in Contact Form 7 in 2 easy steps.
It's critical that your contact form include Google reCAPTCHA or other security features. reCAPTCHA is the most popular option. It helps to protect your contact forms from being filled out by bots or spam. If you want to add reCAPTCHA to your contact form 7, check out this blog post for step-by-step instructions.
Let's get this party started!
{autotoc}
Create Google account for reCAPTCHA
Follow the steps below to create an account for reCAPTCHA and get important information about it.
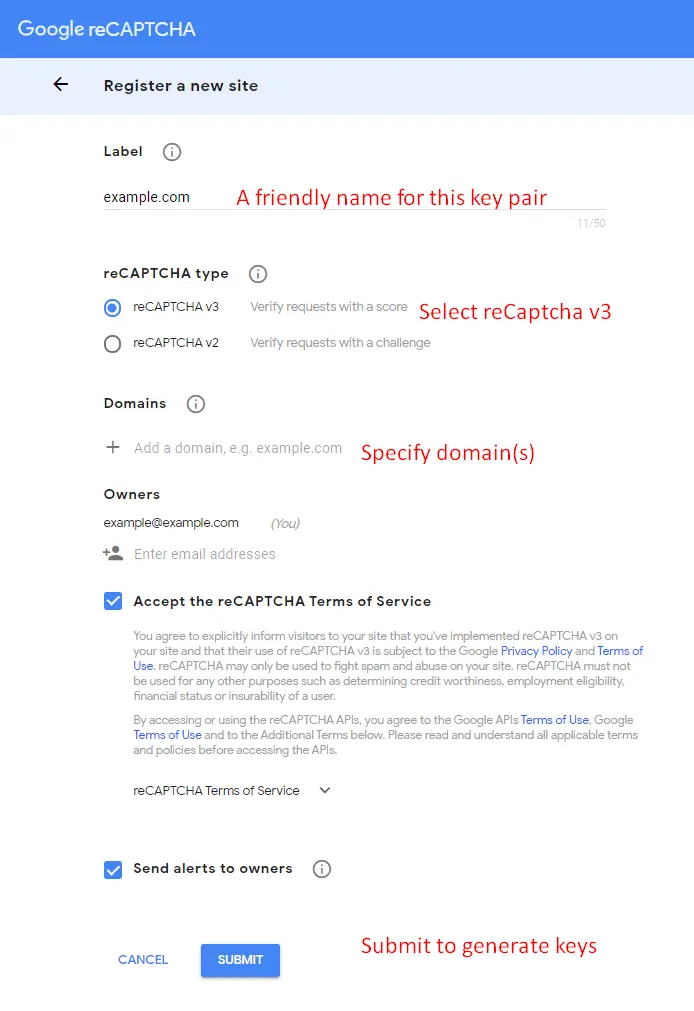
Go to the Google reCAPTCHA web page and then click the "Admin Console" button in the upper right corner. A form will appear on the next window that needs to be completed completely in order to obtain reCAPTCHA API keys.
The following image shows you how to set up an account for reCAPTCHA.
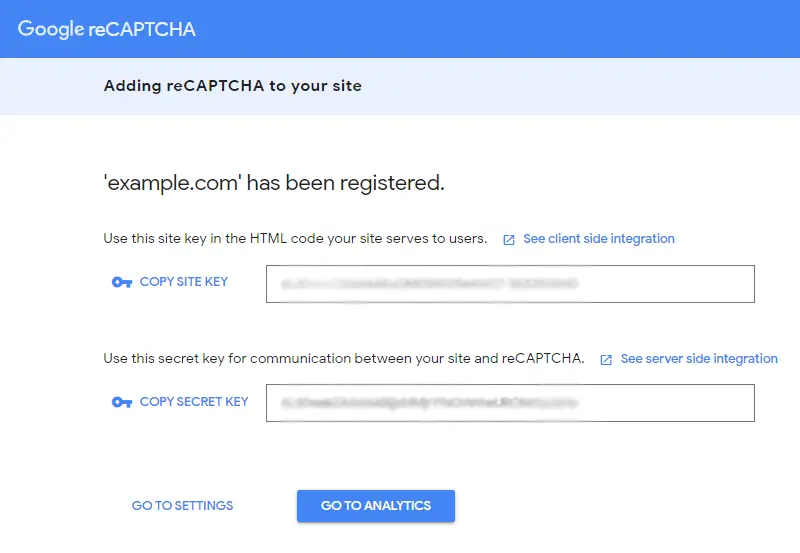
Once you've filled in the blanks, it'll take you to a new page where you'll be given both the SITE KEY and SECRET KEY. Both of these keys will be used later on. Make careful not to lose either key. Alternatively, keep the tab open.
After they've been generated, the keys move on to the next phase.
Log into your WordPress admin panel
Follow the below instructions to add the API keys you have obtained from Google reCAPTCHA into your website and display them on your contact form 7 form.
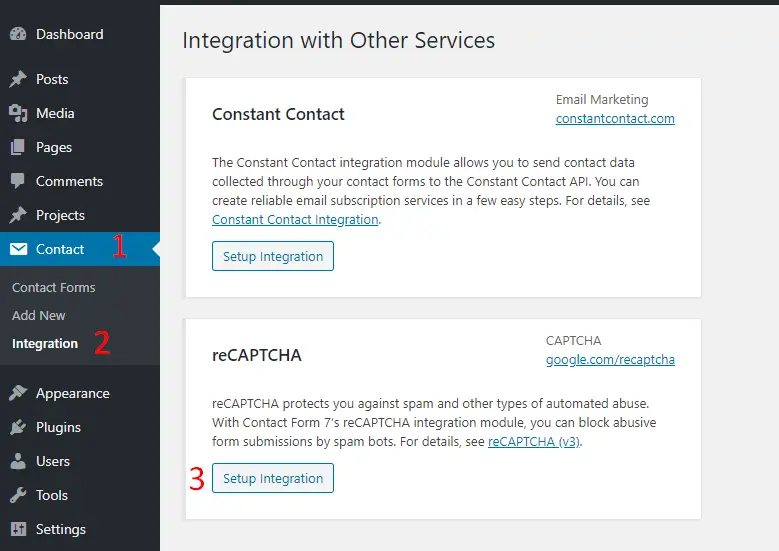
On your WordPress Dashboard, go to the Contact > Integration page.
The next step is to find the reCAPTCHA section and click the Setup Integration option.
On this screen, you'll find two text fields where you must input your site and secret key that you obtained from your Google reCAPTCHA account.
- Once added, your reCAPTCHA keys into the respective input fields. Go to Contact > Contact Forms.
- Then, add the shortcode below to the contact form field: [recaptcha] and save.
- After that, add plugin ReCaptcha v2 for Contact Form 7.
- Then, Go to Contact on your WordPress Dashboard > reCaptcha version > and from the Select reCaptcha Usage dropdown menu > choose reCaptcha Version 2 and submit.
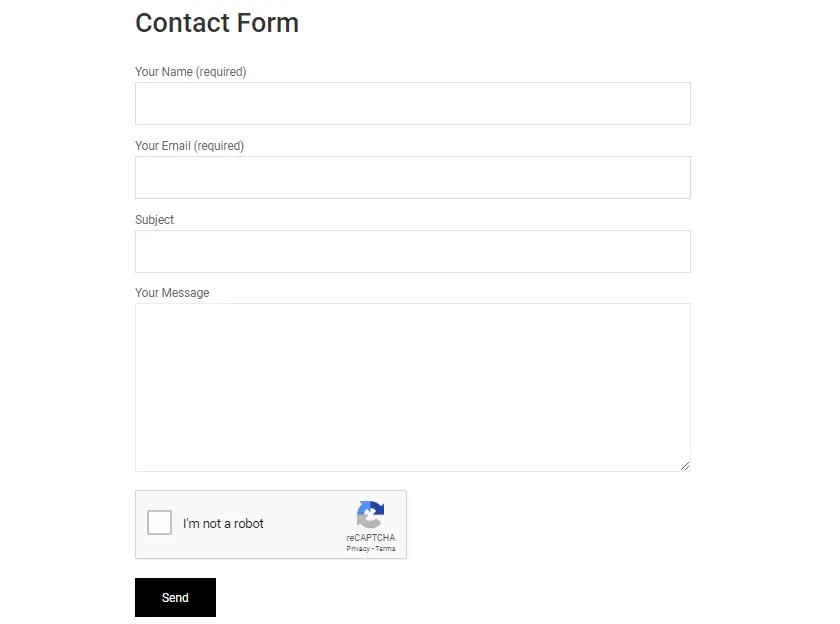
- After this, refresh your site, and you’d be able to see your contact form with reCAPTCHA.
However, the preceding procedures only assist you in adding reCAPTCHA v2 to your contact form. If you wish to use reCAPTCHA v3, you must register your domain again and create a new SITE and SECRET key for the same. In addition, we utilized the shortcode [recaptcha] while adding reCAPTCHA.
IMH
Do you want a fast website?
Who am I kidding? Don't we all?
So why do so many of us struggle?
The biggest challenge is usually finding a fast, reliable hosting company.
We've all been through the nightmares - support take takes forever or doesn't resolve our problem always blaming something on your side...
But the biggest bummer is that the website always feels slow.
At CollectiveRay we host with InMotion hosting and our website is stupid fast. We run on a custom stack of LightSpeed server setup on MariaDB with a PHP7.4 engine and fronted through Cloudflare.
Combined with our front-end optimizations we reliably server 6000 users every single day, with peaks of 50+ simultaneous users.
Want to get a fast setup like ours? Transfer your site for free to InMotion hosting and get our 50% OFF on current pricing.
Try InMotion Hosting with 50% OFF for CollectiveRay visitors in June 2026 ONLY!

Summary
We've shown you how to quickly install reCAPTCHA on your Contact Form 7 above. If you found this blog post useful, please share it with other WordPress users so that they can add a secure layer of protection to their contact forms. You may reach out to us for more assistance and support if you find adding Google reCAPTCHA difficult
Please leave your thoughts on this approach or any other method to add reCAPTCHA to your contact forms in the comments section.